My first proper mushroom grow was a disaster. Not in a dramatic, smoke-alarm, call-the-neighbors kind of way. Just in the quiet, demoralizing way where you check your bags every day for two weeks, see green patches spreading where white mycelium should be, and eventually accept that you’re going to have to throw the whole thing out and start over.
I’m sharing this because most mushroom growing content shows you the wins. The beautiful flushes, the impressive clusters, the triumphant harvest photos. What it doesn’t show you is what week two looks like when everything goes wrong and you’re not sure if the fuzzy white stuff is normal or a catastrophe. (It can be either, which is part of the problem.)
Here’s what actually happened, why it happened, and what changed on every grow after it.
What I was trying to do
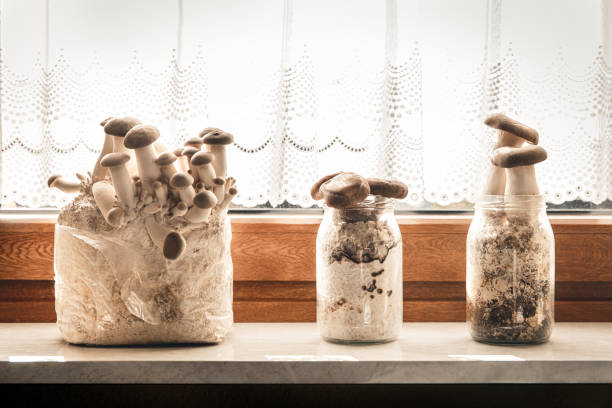
I’d ordered grain spawn online and a bag of hardwood sawdust mix, watched probably six hours of YouTube tutorials, and felt genuinely prepared. The plan was a simple oyster mushroom grow on supplemented sawdust. Nothing fancy. Just wanted to produce something edible before attempting anything more ambitious.
I had my pressure cooker, my mason jars, my still air box made from a storage tub. I had the knowledge. What I did not have was the feel for it, and that turns out to matter more than I expected.
Problem one: the substrate was too wet
Here’s the thing about the squeeze test that every guide mentions: it’s one of those things that’s easy to understand in theory and genuinely tricky to calibrate the first time you do it. The rule is that when you squeeze a handful of substrate, a few drops of water should come out. Not a stream, not a trickle, just a few drops.
My substrate was producing more than a few drops. I knew this. I squeezed it, saw more water than I wanted, and told myself it would probably be fine because I was excited to move forward and didn’t want to wait another day for it to dry out a bit more.
It was not fine. Wet substrate is basically an invitation for bacterial contamination, and bacteria don’t wait around. By day five I had bags that smelled slightly sour, which is never a good sign, and by day ten a couple had visible problems. The wet substrate was almost certainly the main culprit.
Lesson: when in doubt, dry it out more. An extra hour of drying time costs you nothing. Another failed batch costs you time, money, and a pretty significant amount of patience.
Problem two: I inoculated too fast
I’d set up my still air box, sprayed it down with alcohol, let it sit for a few minutes. And then I rushed. I was nervous about contamination in the air and ironically that nervousness made me hurry through the inoculation process in a way that probably introduced more contamination than a slower, more deliberate approach would have.
Working inside a still air box is effective because the air inside it settles and becomes largely free of movement. But it only stays that way if you work slowly. Fast hand movements create air currents. Those currents carry spores. I was so worried about the air that I created exactly the problem I was trying to prevent.
On every grow since, I’ve made a conscious effort to slow down during inoculation. Move like you’re trying not to wake someone up. It feels unnatural when you’re anxious, but it works.
Problem three: I didn’t know what contamination looked like early enough
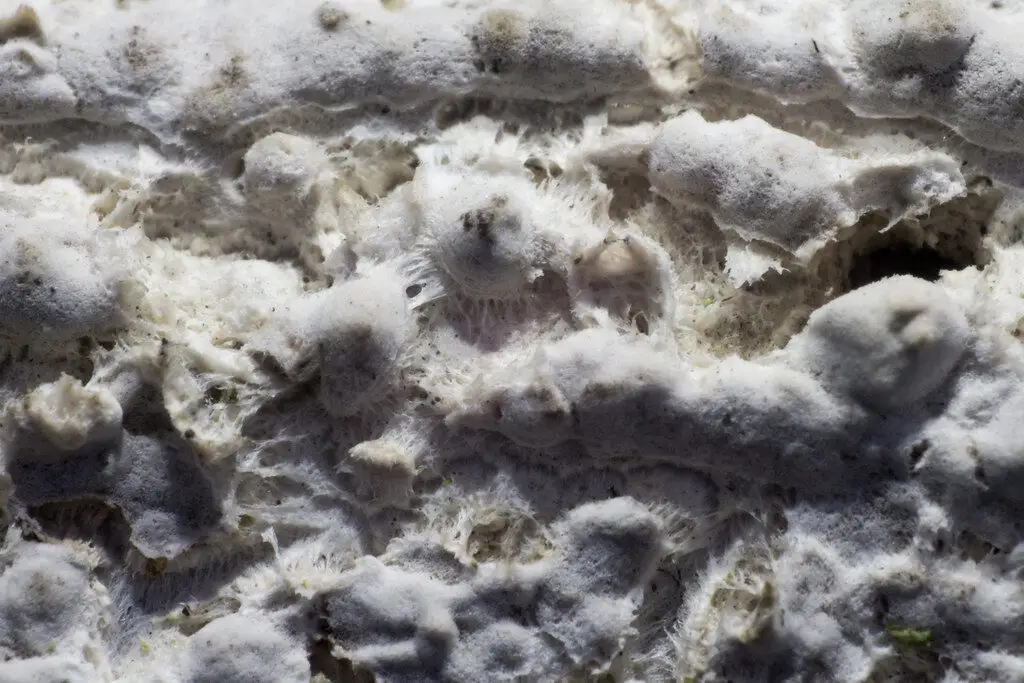
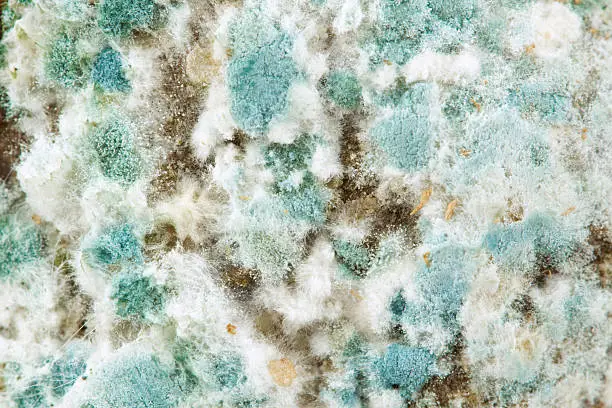
Green mold (almost always Trichoderma) starts white. That’s the frustrating part. For the first few days it looks like mycelium, which is also white. By the time the green color shows up you’ve usually lost that bag, but if you’d caught the slightly different texture or growth pattern a few days earlier you might have isolated it before it sporulated everywhere.
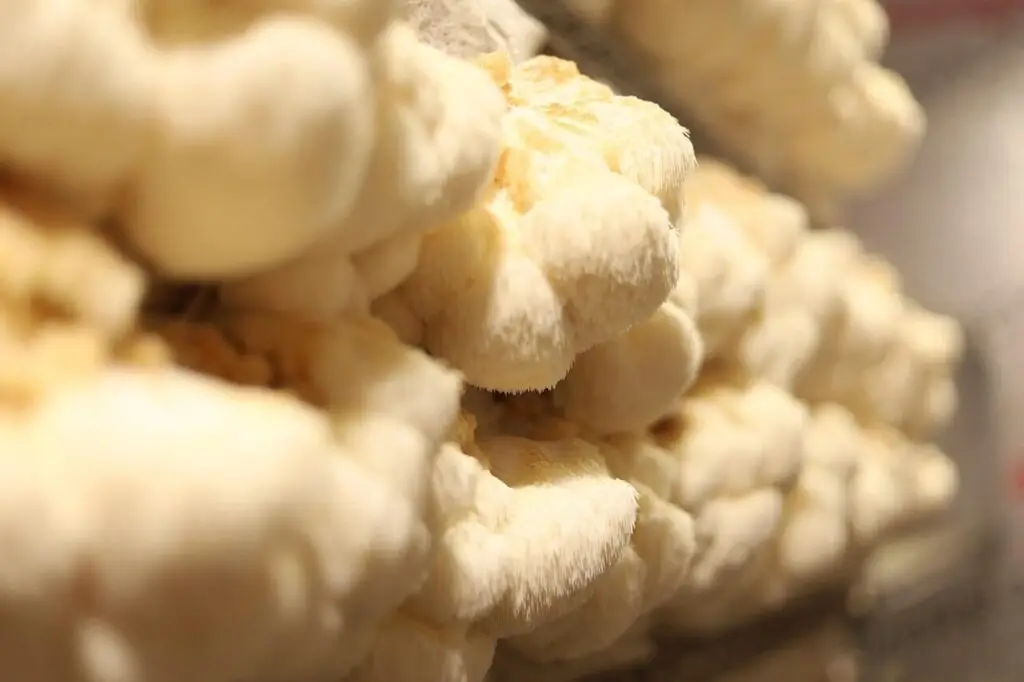
I didn’t know this. I saw white growth and felt relief, and then a few days later I saw green and felt the opposite. Now I know that healthy mycelium has a specific look to it, a ropelike or cottony texture that grows in a particular pattern. Anything that looks slightly off, patchy or powdery or suspiciously fast in one spot, is worth watching closely.
The contamination guide on this site goes into a lot of detail on how to tell the difference between healthy mycelium and early contamination, and I genuinely wish I’d read something like it before that first grow.
The grow that worked
The second attempt went much better, not because I had better equipment or better spawn, but because I was more deliberate about every step. I dried the substrate until the squeeze test gave me what it was supposed to give. I worked inside the still air box slowly and methodically. I cooled my jars overnight before inoculating instead of being impatient and doing it after a few hours.
I still had one contaminated bag out of six. But five bags went on to colonize fully and produce two solid flushes of oyster mushrooms. After the first grow, five out of six felt like an incredible result.
What I’d tell someone starting out
The learning curve in mushroom growing is real but it’s not that steep. Most of the mistakes beginners make, including all of mine, come from one of two things: rushing, or not knowing what normal looks like. Both of those fix themselves with a bit of time.
Don’t skip steps when you’re impatient. Don’t second-guess yourself when things look normal just because you’re anxious they might not be. And when something goes wrong, which it will at some point, try to figure out what caused it rather than just discarding the evidence and starting over blindly.
Every failed bag taught me something. The first grow was a write-off, but I’d argue it was also the most educational thing I did in the first six months of growing.