QUICK ANSWER
Oyster mushrooms are the best species for a first grow. They colonize fast, fruit reliably, and tolerate imperfect conditions.
Grow them on pasteurized straw with grain spawn. No pressure cooker needed. First harvest in three to five weeks.
Oyster mushrooms are where most growers start, and for good reason. They are fast, forgiving, productive, and they grow on cheap, widely available materials. If you have never grown a mushroom before, this is the species to learn on.
This guide covers everything specific to oyster mushrooms: which variety to choose, what you need, the full process from straw to harvest, and the mistakes that trip up most beginners. It assumes a basic understanding of terms like spawn, substrate, and colonization. If those are new to you, start with the complete beginner guide and come back here.
📖 New to mushroom growing? Start with: How to Grow Mushrooms at Home: The Complete Beginner Guide
Choosing your oyster variety
Oyster mushrooms come in several varieties with different temperature preferences, growth speeds, and flavours. Choosing the right one for your home makes a real difference.
| Variety | Fruiting Temp | Speed | Flavour | Best For |
|---|---|---|---|---|
| Pearl Oyster | 10–24°C | Fast | Mild, delicate | 🟢 First grow |
| Blue Oyster | 10–18°C | Fast | Earthy, robust | Cooler rooms |
| Pink Oyster | 18–30°C | Very fast | Seafood-like | Warm climates |
| Golden Oyster | 18–28°C | Moderate | Fruity, nutty | Striking colour |
| King Oyster | 10–18°C | Slow | Dense, meaty | Experienced growers |
For most beginners, pearl oyster is the recommendation. It fruits across the widest temperature range, colonizes quickly, and handles environmental fluctuations better than any other variety. If your home runs warm (above 20C consistently), pink or golden oyster are excellent alternatives.
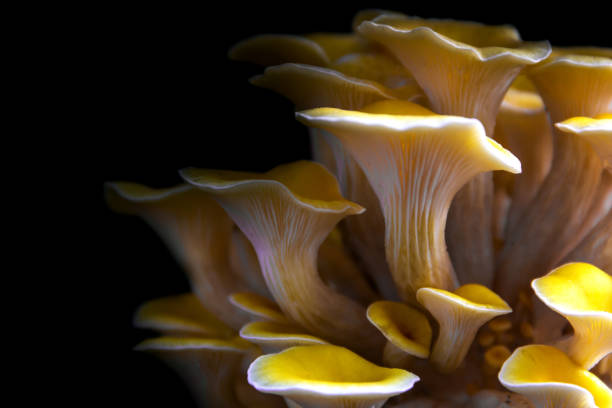
Golden oyster deserves a note: it is one of the most visually striking mushrooms you can grow, with bright yellow caps that cluster in bouquet formations. The trade-off is heavier spore release at maturity. Harvest just before the caps fully flatten and keep your growing space ventilated.
What you need
The supply list for oyster mushrooms is short. Nothing on it is hard to find.
✅ Essential
Grain spawn — oyster mushroom, from a reputable supplier
Straw — wheat or oat. Not hay.
Large pot — for pasteurizing straw
Grow bags or buckets — polypropylene bags or clean 5L bucket
Spray bottle — for misting during fruiting
💡 Helpful But Not Essential
Thermometer — for monitoring pasteurization and fruiting temp
Hygrometer — measures humidity. Cheap ones work fine.
Isopropyl alcohol (70%) — for wiping down surfaces before inoculation
Fruiting chamber — plastic tub with holes. Makes humidity easier.
That is it. You do not need a pressure cooker, a laminar flow hood, or a sterile lab. Oyster mushrooms on straw are a kitchen-counter operation.
Pasteurize your straw
Straw is the go-to substrate for oyster mushrooms. It is cheap, widely available, and only needs pasteurization — not sterilization. A large pot and hot water is all you need.
Straw Prep
Pasteurization in Five Steps
1. Chop
5–10cm lengths
→
2. Heat
75–80°C · 1–2 hrs
→
3. Drain
Thoroughly
→
4. Squeeze
Few drops = right
→
5. Cool
Room temp. Do not rush.
The squeeze test is your moisture guide: grab a handful of cooled straw and squeeze firmly. A few drops of water is correct. A steady stream means it needs more draining time. This step matters more than most beginners realize — too much moisture is one of the top causes of contamination.
For a deeper look at substrate options and preparation methods, see the substrate guide on the main growing page.
Inoculate
Inoculation is mixing your grain spawn into the prepared straw. The priority is cleanliness and speed.
Wipe down your work surface with isopropyl alcohol. Wash your hands or wear gloves. Have everything ready before you open the spawn bag.
Layer straw and grain spawn in a grow bag or clean bucket. Alternate layers: a few inches of straw, a handful of spawn, more straw, more spawn. Aim for 10 to 20 percent spawn by weight. Seal the bag or cover the bucket loosely to allow gas exchange while keeping contaminants out. Label with the date.
The full inoculation process with step-by-step detail is covered in the complete beginner guide.
Colonization
Move your inoculated bags to a warm location (21 to 27C) and leave them alone.
What to Expect
Colonization Timeline
|
Days 1–3 |
Nothing visible yet. Mycelium is establishing at spawn points. This is normal. |
|
Days 3–7 |
White threads visible around spawn. Good sign. Do not disturb. |
|
Days 7–21 |
Mycelium spreads throughout. Block progressively turns white and firms up. |
|
Fully white |
Uniformly colonized and firm. Ready to fruit. Cut slits and begin misting. |
Fuzzy white growth on the surface is aerial mycelium — normal and healthy. Not contamination.
Do not open or disturb the bags during colonization. Every time you open them, you introduce contaminants. The mycelium knows what to do. Let it work.
Initiate fruiting
Once fully colonized (uniformly white and firm), you are triggering the mushroom to fruit by changing its environment.
Cut several X shapes or slits in the bag. Move to a spot with indirect light, 15 to 24C (warmer for pink and golden varieties). Begin misting two to four times daily. Fan the area briefly two to three times a day for fresh air exchange.
Pins should appear within three to seven days.
Oyster Mushroom Conditions
Fruiting Environment Quick Reference
Humidity
85–95%
Mist 2–4x daily
Temperature
15–24°C
Pearl/Blue. Pink/Golden: 18–30°C
Fresh Air
2–3x daily
Fan briefly. Leggy stems = more air
Light
Indirect
Window or LED. No direct sun.
The most common fruiting problem with oyster mushrooms is long, leggy stems with small caps. That means not enough fresh air. Increase ventilation and the next flush will produce better-shaped mushrooms.
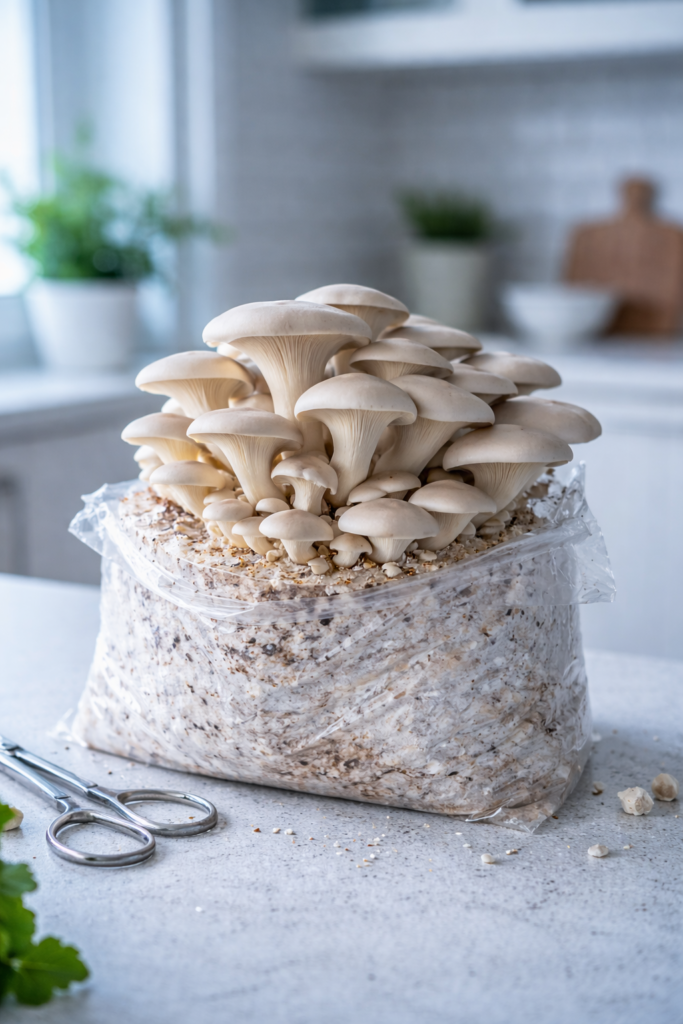
Harvest
✅ Ready to Harvest
Caps fully formed, edges still curve slightly downward
Colour at its brightest and most vivid
Firm texture, clean surface
⚠️ Too Late
Cap edges turning upward, surface wrinkling
Fine white powder (spores) on nearby surfaces
Still edible but past peak flavour and texture
Twist and pull the entire cluster from the base. Do not cut — stumps left behind can rot. Remove any remaining debris from the fruiting site.
After harvesting, rest the block for five to seven days. Soak in cold water for one to two hours to rehydrate. Begin misting again. Most blocks produce two to three flushes. The first is the largest.
🧊
Fresh
Paper bag in fridge. Not plastic. Keeps 4–7 days.
☀️
Dried
Dehydrate 40–50°C, 4–6 hours. Lasts months.
❄️
Frozen
Saute first. Raw oysters freeze poorly.
Common mistakes
Avoid These
Common Oyster Mushroom Mistakes
| 🔥 |
Inoculating warm straw Kills spawn and invites bacteria. Always cool to room temperature first. |
| 💧 |
Straw too wet Squeeze test: few drops = right. Streaming = too wet. Drain more. |
| 🌬️ |
Not enough fresh air Long thin stems and small caps = CO2 buildup. Fan more often. |
| ⏰ |
Harvesting too late Oysters go from perfect to past-peak in 24 hours. Check daily. |
| 🌧️ |
Misting directly onto pins Heavy mist on young pins causes aborts. Mist walls and surface around them. |
| 🌾 |
Using hay instead of straw Hay has seed heads and more competing organisms. Looks similar, performs worse. |
Frequently asked questions
Three to five weeks from inoculation to first harvest. Colonization takes one to three weeks, then pins appear within three to seven days of initiating fruiting and reach harvest size within a week.
A well-made block can produce 500 grams to over a kilogram of fresh mushrooms across multiple flushes from a kilogram of dry straw. Oyster mushrooms are among the most productive species for home growing.
Aborted pins are almost always caused by insufficient humidity, too much CO2 from poor air exchange, or a sudden temperature change. Check all three. Increase misting, fan more often, and make sure the growing area has stable temperature.
Yes. A single bag on a kitchen counter is enough. The main consideration is spore release at harvest — harvest before caps fully flatten and keep the area ventilated. Golden and pink varieties release more spores than pearl or blue.
Straw is the dried stem of grain plants after the seed heads are removed. Hay is dried grass that still contains seed heads and more competing organisms. Use straw. Hay looks similar but performs much worse as a substrate.
A spent block can be buried in a shaded garden bed and may produce outdoor mushrooms seasonally. It also makes excellent compost material. Do not reuse spent substrate for a new indoor grow.
Next steps
Once you have a couple of oyster grows under your belt, lion’s mane is the natural next species. The process is similar but uses hardwood sawdust substrate and rewards the extra attention with one of the most remarkable mushrooms you can produce at home.