Difficulty: Beginner to intermediate | Time to first harvest: 6 to 18 months (logs) or 8 to 14 weeks (sawdust) | Pressure cooker needed: Sawdust method only
Turkey tail is one of the most common mushrooms in the world. Walk through almost any temperate woodland and you will find it growing in layered, fan-shaped brackets on fallen logs and dead branches. That ubiquity tells you something useful: turkey tail is tough, adaptable, and not particularly demanding about its growing conditions. It is also the most clinically researched medicinal mushroom on the planet, with decades of studies behind its immune-modulating properties.
Growing turkey tail at home is different from growing oyster mushrooms, lion’s mane, shiitake, or reishi in one important way: it is not primarily grown for cooking. Turkey tail has a tough, leathery texture and a mild, slightly woody flavour that does not make it a culinary mushroom in the conventional sense. You grow it for its medicinal properties, to dry and powder it for tea, to add to broths, or to make a simple hot water extract.
This guide covers both the log method and the sawdust block method. The log method is the more natural fit for turkey tail and requires no pressure cooker. The sawdust method produces faster results. Both are straightforward once you understand what this mushroom needs.
Why Grow Turkey Tail at Home?
Turkey tail supplements, particularly PSK and PSP extracts, are among the more expensive medicinal mushroom products on the market. Growing your own fruiting bodies and preparing simple hot water extracts at home is a cost-effective alternative that gives you a whole-mushroom product rather than an isolated fraction.
The health case for turkey tail is the strongest of any mushroom in this series in terms of clinical evidence. PSK has been used as an adjunct oncology treatment in Japan since the 1980s, and its prebiotic effects on the gut microbiome are among the best-documented of any natural compound. For the full detail, see our turkey tail mushroom benefits guide.
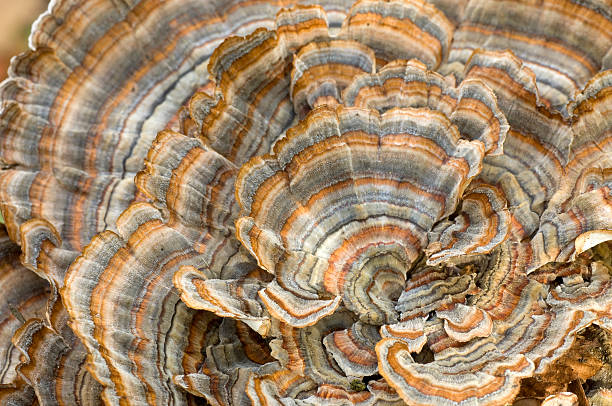
Turkey tail is also visually striking. A well-grown cluster with its concentric bands of brown, tan, grey, and cream is one of the more beautiful things you can produce on a home grow. It photographs well, which matters if you plan to share your growing journey on social media or Pinterest.
An Important Note on Identification
Turkey tail (Trametes versicolor) has several lookalikes in the wild, including false turkey tail (Stereum ostrea), which does not have the same medicinal properties. When growing from purchased spawn, this is not a concern since you know exactly what species you are cultivating. If you are ever tempted to wild-harvest turkey tail instead of growing it, take time to learn the identification markers: true turkey tail has a velvety upper surface with clearly defined concentric colour bands, and a white to cream pore surface underneath with tiny visible pores. False turkey tail has a smooth, non-porous underside.
For home growing purposes, always use purchased spawn from a reputable supplier and this concern does not apply.
What You Need
For the Log Method (Recommended for Beginners)
- Turkey tail plug spawn or sawdust spawn: Plug spawn is the easiest format for log inoculation. Buy from a reputable supplier.
- Fresh hardwood logs or a stump: Turkey tail is less fussy about log species than shiitake or reishi. Oak, beech, alder, birch, and most deciduous hardwoods work well. Freshly cut logs within six weeks are ideal, or an existing stump in your garden.
- Drill and 8.5mm bit: For drilling inoculation holes.
- Wax and brush: Cheese wax or beeswax to seal plugs.
- Rubber mallet: For tapping plugs flush with the bark.
For the Sawdust Block Method
- Turkey tail grain or sawdust spawn: Either works well.
- Hardwood sawdust: Oak, beech, or alder. Hardwood pellets work well.
- Wheat bran (optional): 10 to 15 percent by weight improves yields.
- Pressure cooker: Required for the sawdust method. 15 PSI for 2.5 hours.
- Autoclave bags: Polypropylene bags with filter patches.
- Spray bottle: For misting during fruiting.
The Log Method (Step by Step)
The log method is the most natural way to grow turkey tail and the easiest entry point for beginners since no pressure cooker is required. A freshly inoculated log or stump also makes a long-term addition to a garden, producing mushrooms for several years with almost no maintenance.
Using Logs
- Source or cut your logs. Freshly cut hardwood logs, two to six weeks old, 10 to 20cm in diameter and 60 to 90cm long. Logs older than eight weeks may already be colonised by competing fungi.
- Drill inoculation holes. Use an 8.5mm bit to drill holes in a diamond pattern along the length of the log, spacing them 5 to 8cm apart in offset rows. Drill 30 to 50 holes per log depending on size.
- Insert plug spawn. Tap a plug into each hole with a rubber mallet until flush with or just below the bark surface.
- Seal with wax. Melt wax and brush generously over each plug and the drilled area around it to seal in moisture and exclude competitors.
- Place in a shaded, moist location. Unlike reishi, turkey tail prefers cooler conditions. A shaded spot in a garden, under trees, or against a north-facing fence is ideal. Stack logs off the ground on a pallet or two bricks to allow air circulation and prevent rot from below.
- Keep moist. Water during dry spells. Logs should feel damp, not dry, throughout colonisation.
- Wait for colonisation and natural fruiting. Turkey tail typically colonises logs within six to twelve months and fruits naturally in cool, wet conditions, usually autumn and early winter. You can trigger fruiting by soaking logs in cold water for 24 hours during appropriate weather.
Using a Garden Stump
If you have a freshly cut hardwood stump in your garden, turkey tail is an excellent candidate for stump inoculation. The large wood mass of a stump supports years of production with minimal intervention.
- Drill holes across the top of the stump and around the sides in the same diamond pattern used for logs.
- Insert plug spawn and seal with wax.
- Cover the top of the stump loosely with a piece of hessian or burlap weighted down with a stone to retain moisture during colonisation.
- Leave in place. Turkey tail will colonise the stump over six to eighteen months and fruit naturally when conditions are right.
The Sawdust Block Method (Step by Step)
The sawdust method produces turkey tail indoors on a faster timeline than log cultivation. The process is the same as for lion’s mane and shiitake: sterilise your substrate, inoculate with spawn, allow to colonise, then initiate fruiting.
- Prepare substrate. Mix hardwood sawdust with 10 to 15 percent wheat bran. Add water to field capacity. The squeeze test applies: a few drops when squeezed firmly, not a stream.
- Pack and sterilise. Fill autoclave bags to two thirds and sterilise at 15 PSI for 2.5 hours. Cool completely, 12 to 24 hours, before inoculating.
- Inoculate. Work on a clean surface. Add grain spawn at 15 to 20 percent of substrate weight, distribute evenly, mix lightly, and seal the bag.
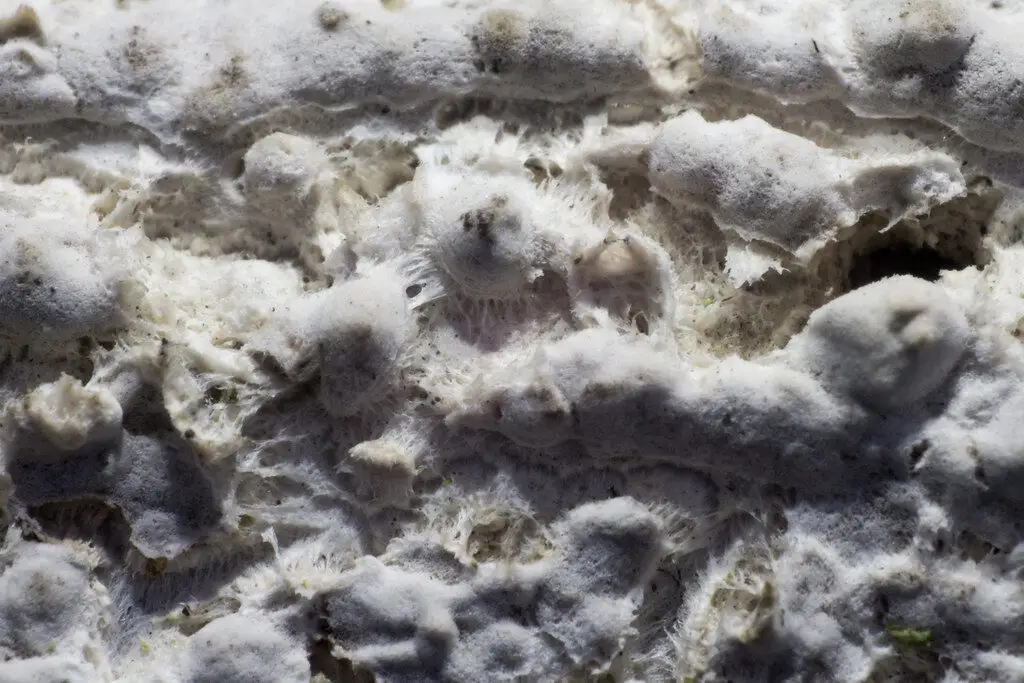
- Colonise at 21 to 24C for 4 to 8 weeks. Turkey tail colonises at a moderate pace. White mycelium will spread progressively through the block.
- Initiate fruiting. Once fully colonised, cut a wide opening in the bag or remove the block. Move to a cooler location (15 to 22C) with high humidity and good fresh air exchange. Turkey tail prefers cooler fruiting conditions than most other species.
- Mist regularly. Two to three times daily. Turkey tail fans form from the edges of the block and spread outward.
Fruiting Environment
| Factor | Target range | Notes |
| Humidity | 80 to 90 percent | Turkey tail tolerates slightly lower humidity than lion’s mane. Consistent misting is still important. |
| Temperature | 15 to 22C | Cooler than most other species. Turkey tail does not fruit well in warm conditions above 25C. |
| Fresh air exchange | Two to three times daily | Moderate requirement. Poor FAE results in thin, elongated brackets rather than the characteristic fan shape. |
| Light | Indirect, 12 hours | Turkey tail grows toward light. Position light source where you want the fans to face. |
Harvesting Your Turkey Tail
When to Harvest
Turkey tail develops slowly and the harvest window is more forgiving than oyster mushrooms or lion’s mane. That said, getting the timing right does affect quality.
- Ready to harvest: The fan-shaped brackets have reached full size and the concentric colour bands are clearly defined. The white growing edge around the outer rim of each fan has disappeared, indicating growth has completed. The underside shows a cream to white pore surface with fine, uniform pores.
- Getting close: White edge is becoming very thin. Harvest within a day or two.
- Too late: Fans are tough, dry, and discoloured. Still medicinal but the texture has become very leathery and the active compound concentration may be lower.
How to Harvest
- Grip the base of each fan and twist gently while pulling away from the substrate or log.
- For sawdust blocks, clean any stubs from the surface and rest the block for one to two weeks before attempting a second flush.
- For logs, leave the log in place and allow it to fruit again naturally in subsequent seasons.
How to Use Your Turkey Tail Harvest
Turkey tail is tough and leathery when fresh and is not eaten whole like oyster mushrooms or lion’s mane. The goal is to extract its active compounds, primarily PSK, PSP, and beta-glucans, through heat and water.
- Dried whole: Dehydrate the fans at 50 to 60C for six to ten hours until completely dry and brittle. Store in an airtight container. Use to make tea, broth, or hot water extract.
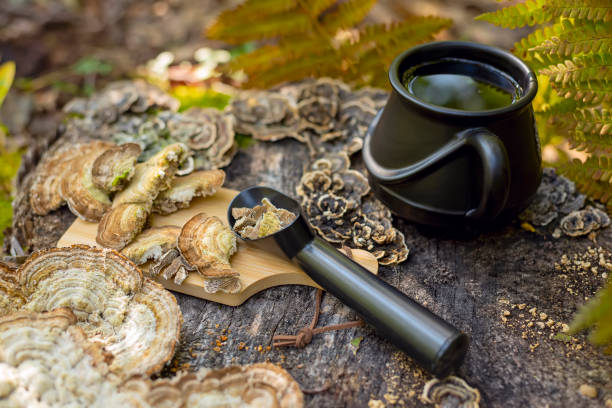
- Turkey tail tea: Simmer two to three dried fans in one litre of water for 30 to 60 minutes. The beta-glucans require hot water extraction to become bioavailable. Strain and drink. The flavour is mild and earthy with a slight sweetness. It pairs well with ginger and lemon.
- Powdered: Grind dried turkey tail in a high-powered blender or coffee grinder. Add to tea, coffee, soups, or broths. The powder dissolves reasonably well in hot liquid.
- Broth addition: Turkey tail is traditional in Asian cooking as a broth ingredient rather than an eaten mushroom. Add a few dried fans to any bone broth or vegetable stock and simmer for an hour or more. Remove before serving.
Common Mistakes (And How to Avoid Them)
- Using logs that are too old. Logs cut more than eight weeks before inoculation may already have competing fungi established in the wood. Always use freshly cut logs or buy from a supplier who can confirm the cutting date.
- Fruiting in a warm room. Turkey tail prefers cooler fruiting temperatures than any other species in this series. A warm indoor environment above 25C will produce poor results. Choose a cooler location or grow during autumn and winter when house temperatures are naturally lower.
- Expecting culinary use. Turkey tail is a tough, leathery mushroom. It is not enjoyable as a cooked vegetable. If you grow it expecting to eat it like oyster or shiitake, you will be disappointed. Process it as a medicinal extract.
- Confusing turkey tail with false turkey tail. When growing from spawn this is not an issue, but if you are ever inspired to supplement home grown with wild harvested mushrooms, take time to learn the difference. False turkey tail has a smooth, non-porous underside. True turkey tail has a white pore surface with tiny uniform pores visible to the naked eye.
- Not sealing log plugs properly. Inadequate waxing leaves openings for competing moulds and bacteria. Apply wax generously over each plug and the surrounding bark area, not just a thin coat directly on the plug head.
- Drying turkey tail at too high a temperature. Some of the active polysaccharides in turkey tail can degrade at temperatures above 60C. Dehydrate at 50 to 55C for best preservation of active compounds.
Frequently Asked Questions
How long does turkey tail take to grow at home?
On logs, expect six to eighteen months before the first flush depending on log size, temperature, and moisture conditions. On sawdust blocks indoors, the full cycle from inoculation to first harvest typically takes eight to fourteen weeks. Log cultivation is slower but produces mushrooms for years without further effort.
Can I wild-harvest turkey tail instead of growing it?
Turkey tail is very common in temperate woodlands and is a popular wild harvest. If you choose to forage it, learn to identify true turkey tail from its lookalikes, particularly false turkey tail (Stereum ostrea), which does not have the pore surface and lacks the same medicinal properties. Only harvest from clean environments away from roadsides, industrial areas, or treated wood, since mushrooms can accumulate environmental pollutants. Growing from spawn removes all of these concerns entirely.
How do I know if my turkey tail is medicinal quality?
Home grown turkey tail from quality spawn on a good hardwood substrate produces genuinely medicinal fruiting bodies. The key indicators of quality are clear colour banding on the upper surface, a white to cream pore surface underneath with fine uniform pores, and a firm but pliable texture when fresh. Avoid using fans that have become very tough, dry, and discoloured, which indicates overmature or compromised growth.
How much turkey tail do I need to take daily?
Most research on turkey tail uses doses of one to three grams of dried mushroom or extract per day. For home-prepared tea, two to three grams of dried turkey tail simmered in water for 30 to 60 minutes daily is a reasonable starting point. For more detail on dosing and what the research shows for specific health applications, see our full turkey tail mushroom benefits guide.
The Easiest Medicinal Mushroom to Get Growing
Turkey tail is arguably the most accessible medicinal mushroom to start growing at home. The log method requires no specialist equipment, no pressure cooker, and no climate control. You drill some holes, tap in some plugs, seal with wax, and find a shaded spot outside. The mushroom does the rest.
The wait is longer than other species but the return is years of harvests from a single inoculation, from a mushroom with one of the most robust bodies of clinical research in the medicinal fungi world.
For more in this series, see how to grow oyster mushrooms at home, how to grow lion’s mane mushrooms at home, how to grow shiitake mushrooms at home, and how to grow reishi mushrooms at home. The complete guide to growing mushrooms at home covers all the foundational techniques in one place.