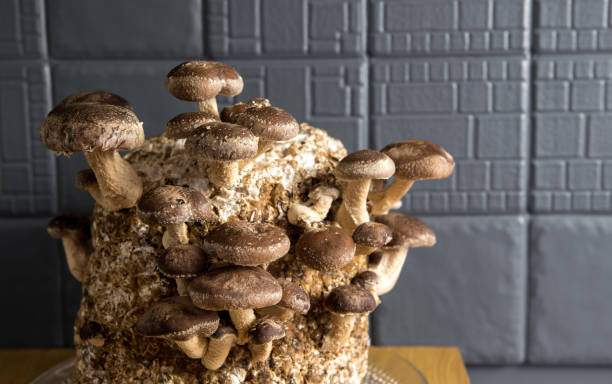
How to Grow Shiitake Mushrooms at Home (Step by Step Guide)
Shiitake is a step up from oyster mushrooms in patience but not in difficulty. It colonizes slower, needs a deliberate fruiting trigger, and can be particular about temperature. None of that is hard to manage once you understand why each step matters.
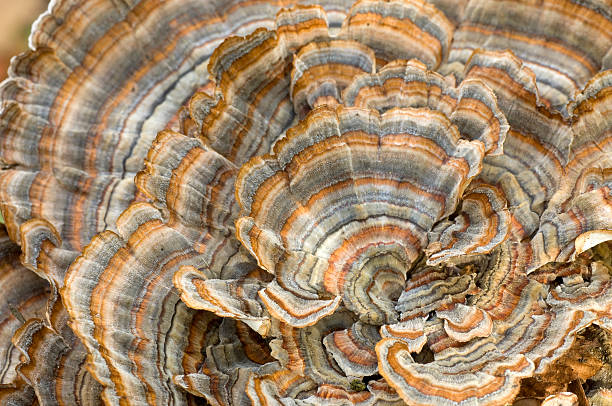
The reward is worth the wait. Shiitake has genuine culinary depth that oyster and lion’s mane cannot match, and a health profile (lentinan, eritadenine, beta-glucans) that puts it in the same conversation as reishi and turkey tail for immune support.
There are two ways to grow shiitake at home: sawdust blocks (faster, indoor, more control) and logs (slower, outdoor, produces for years). This guide covers both. Choose your method based on your timeline and space.
If you are brand new to mushroom growing, start with the complete beginner guide first. It covers sterilization, spawn types, colonization, and contamination prevention in detail. This guide assumes you understand those basics.
Choose your strain
This matters more with shiitake than with any other home-grown species.
Shiitake strains are bred for specific temperature ranges. A cool weather strain (fruiting at 50 to 60F) in a warm room will colonize slowly and fruit reluctantly. A warm weather strain (fruiting at 64 to 77F) outdoors in autumn will underperform.
For most home growers, a wide range strain is the safest starting point. These fruit across 54 to 75F and tolerate the temperature fluctuations of a normal house. Check the specifications on your spawn before buying and match to the conditions you can actually provide.
The sawdust block method
Prepare and sterilize
Mix 80% hardwood sawdust with 20% wheat bran by dry weight. If using hardwood fuel pellets (the cheapest option), add water first and let them break down into sawdust before mixing in the bran.
Adjust moisture to field capacity. The squeeze test: grab a handful, squeeze hard. A few drops should come out. If water streams, it is too wet. If nothing comes out, add more water.
Fill autoclave bags loosely to two-thirds full. Leave room for expansion. Fold the tops over and secure with impulse sealer or tape.
Sterilize at 15 PSI for 2.5 to 3 hours. Shiitake on supplemented substrate benefits from the full three hours because the wheat bran creates a richer environment for contaminants. Cool completely before inoculating. This means 12 to 24 hours. Do not rush it.
For the full sterilization walkthrough, see the beginner guide sterilization section. If you do not own a pressure cooker, the Instant Pot grain spawn method covers an alternative approach, though for supplemented sawdust blocks, a proper pressure cooker is strongly recommended.
Inoculate
Work in a still air box or in front of a flow hood. Clean your workspace, wear gloves, wipe surfaces with isopropyl alcohol.
Add shiitake spawn at 15 to 20% of substrate weight. Break up grain spawn or mix sawdust spawn throughout the substrate evenly. Seal the bag. Label with date and strain name.
Colonization
Move bags to a warm location. 70 to 78F is ideal. Shiitake colonizes at roughly the same speed as lion’s mane, which means slower than oyster. A fully colonized block typically takes 4 to 8 weeks depending on spawn rate, temperature, and bag size.
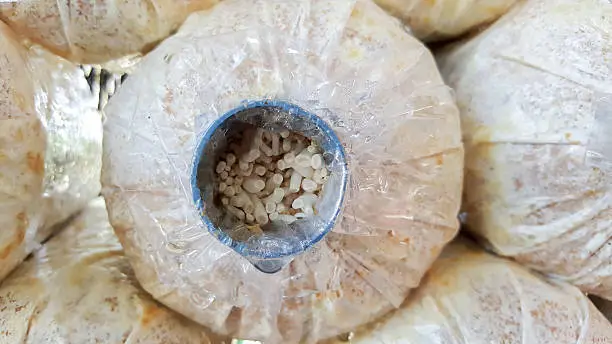
The brown crust (primordia skin)
This is the single most misidentified “problem” in shiitake growing.
Fully colonized shiitake blocks develop a brown, leathery crust on the outside surface. This is called the primordia skin (or popcorning, depending on texture). It is a consolidation layer that forms when the mycelium has fully colonized the substrate and is preparing to fruit.
It is not contamination, its is the opposite, it means the block is ready.
The fruiting trigger
This is what makes shiitake different from every other species you will grow at home.
Oyster mushrooms fruit when you cut a hole and give them fresh air. Lion’s mane fruits when humidity is high enough. Shiitake often will not fruit at all without a deliberate stress trigger. In nature, this is a heavy rain event or a sudden temperature drop. At home, you replicate it with a cold water soak.
Remove the block from its bag once fully colonized and the primordia skin has formed. Submerge it in cold water (50 to 59F, tap water is usually fine, add ice if your tap runs warm). Weight it down so it stays submerged. Leave it for 12 to 24 hours.
Drain the block. Move it to your fruiting environment. Expect pins in 5 to 10 days.
If your fully colonized block is sitting in fruiting conditions and producing nothing after two weeks, the cold water soak is almost always the fix. This is the number one reason shiitake blocks fail to fruit. It is not contamination or bad spawn. It is the missing trigger.
Repeat the cold water soak between every flush. Rest the block for 7 to 14 days after harvest, then soak again.
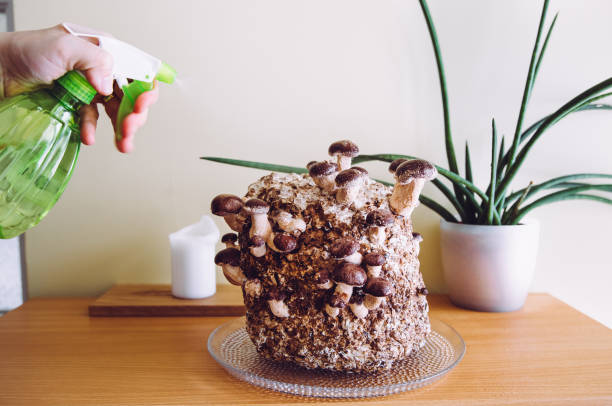
Fruiting environment
Shiitake tolerates slightly drier conditions than oyster or lion’s mane but still needs regular misting to maintain 80 to 90% humidity. Match temperature to your strain.
Fresh air exchange 2 to 4 times daily. Shiitake is less sensitive to CO2 buildup than lion’s mane but still needs airflow.
Indirect light on a 12-hour cycle. Natural window light or a simple LED works.
The log method
Log-grown shiitake is slower to set up and takes 6 to 12 months before the first harvest. The payoff is significant: a single inoculated log produces mushrooms for 3 to 5 years with minimal maintenance. Log-grown shiitake also has thicker caps, denser texture, and more intense flavor than block-grown.
Source fresh hardwood logs. Oak is ideal. Cut within the last 2 to 6 weeks. 4 to 6 inches diameter, 3 to 4 feet length. Very fresh logs (under 2 weeks) still have active antifungal compounds. Logs older than 6 weeks may already host competing fungi. The 2 to 6 week window is the sweet spot.
Drill holes in a diamond pattern. 5/16 inch drill bit. Space holes 2 to 3 inches apart in offset rows along the length. Typically 30 to 50 holes per log depending on size.
Insert plug spawn. Tap a plug into each hole with a rubber mallet, flush with or just below the bark surface. The bark is the protective layer. Keep it intact.
Seal with wax. Melt cheese wax or beeswax and brush over each plug to seal in moisture and block contaminants. Every plug needs to be sealed.
Store in shade. Stack logs off the ground (on pallets or rails) somewhere shaded and reasonably humid. Avoid direct sun and wind. Water during dry spells. If no rain for two weeks, soak thoroughly with a hose.
After 6 to 12 months of colonization, trigger fruiting with a cold water soak (24 to 48 hours for logs, longer than blocks). Pins should appear within 1 to 2 weeks.
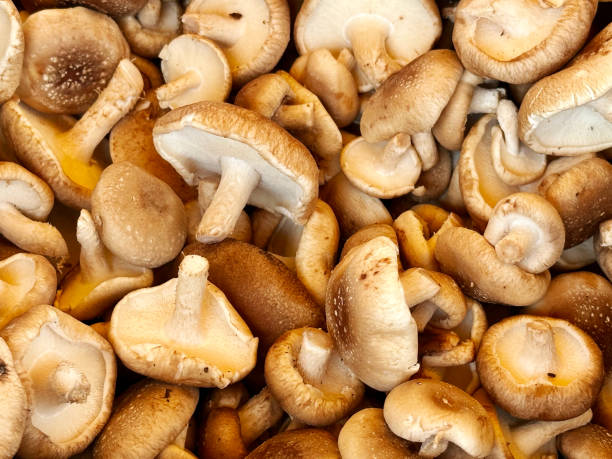
Harvest and storage
Harvest when the cap is fully formed and the veil underneath is still partially intact or just beginning to tear. This is peak flavor and texture. If the cap edges are curling upward and the gills are fully exposed, it is past prime but still edible.
Grip the stem near the base and twist while pulling. Remove any remaining stub from the block or log.
Shiitake dries exceptionally well. Dried shiitake has an intense, concentrated umami flavor and rehydrates with minimal quality loss. If you only store your harvest one way, drying is the best choice for shiitake. A simple food dehydrator at 130 to 140F for 6 to 8 hours produces perfectly dried shiitake that stores for months in an airtight container.
Common mistakes
Shiitake vs other species
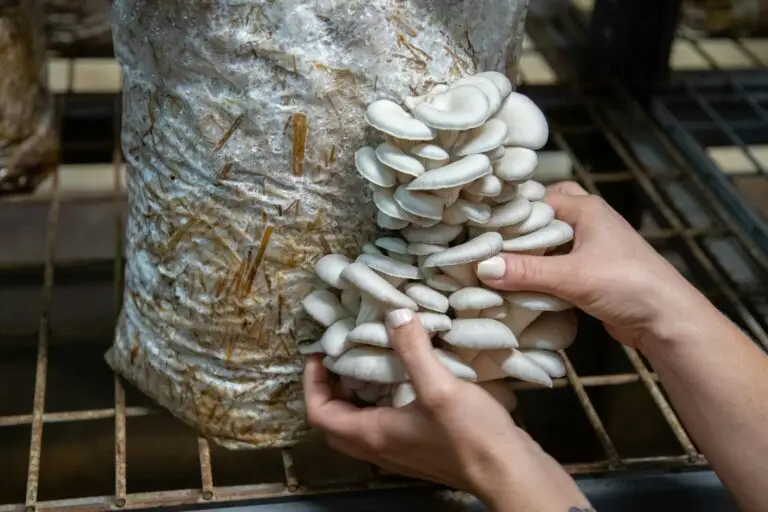
If this is your first species, consider running oyster mushrooms alongside it. Oyster colonizes in 2 to 3 weeks and fruits fast, giving you a harvest while the shiitake takes its time.
If you already have oyster and lion’s mane running, shiitake completes the core trio of home-grown mushrooms. Between the three, you have a fast producer (oyster), a cognitive health mushroom (lion’s mane), and a long-lasting culinary and medicinal species (shiitake).
For something more advanced after shiitake, reishi is the natural next step: similar substrate, longer timeline, and a completely different form factor (antler or conk rather than a traditional cap-and-stem mushroom).
Frequently asked questions
Sawdust blocks: 6 to 12 weeks from inoculation to first harvest. Colonization takes 4 to 8 weeks, fruiting takes 1 to 3 weeks after the trigger soak. Logs: 6 to 12 months before first harvest, then years of production.
Almost always because it needs the cold water soak fruiting trigger. Remove from the bag, soak in cold water for 12 to 24 hours, drain, and place in your fruiting environment. If triggered and still nothing after 10 days, check temperature matches your strain.
Sawdust blocks: 3 to 5 flushes. First and second are most productive. Each requires a cold water soak and 7 to 14 days of rest between harvests. Logs produce seasonally for 3 to 5 years.
The log method does not need one. Plug spawn, a drill, and wax is the entire setup. The sawdust block method requires sterilization and a pressure cooker is essentially necessary. If you do not own one, start with logs or see the Instant Pot method for grain spawn (though supplemented sawdust still needs a proper PC).
The primordia layer. A consolidation crust that forms on fully colonized blocks. It is a positive sign that the block is ready for the fruiting trigger. Not contamination.